Chapter 5: Manipulating an existing PDF document
Which version?
This Tutorial was written with iText 7.0.x in mind, however, if you go to the linked Examples you will find them for the latest available version of iText. If you are looking for a specific version, you can always download these examples from our GitHub repo (Java/.NET).
In the examples for chapter 1 to 3, we've always created a new PDF document from scratch with iText. In the last couple of examples of chapter 4, we worked with an existing PDF document. We took an existing interactive PDF form and filled it out, either resulting in a pre-filled form, or resulting in a flattened document that was no longer interactive. In this example, we'll continue working with existing PDFs. We'll load an existing file using PdfReader and we'll use the reader object to create a new PdfDocument.
Adding annotations and content
In the previous chapter, we took an existing PDF form, job_application.pdf, and we filled out the fields. In this chapter, we'll take it a step further. We'll start by adding a text annotation, some text, and a new check box. This is shown in
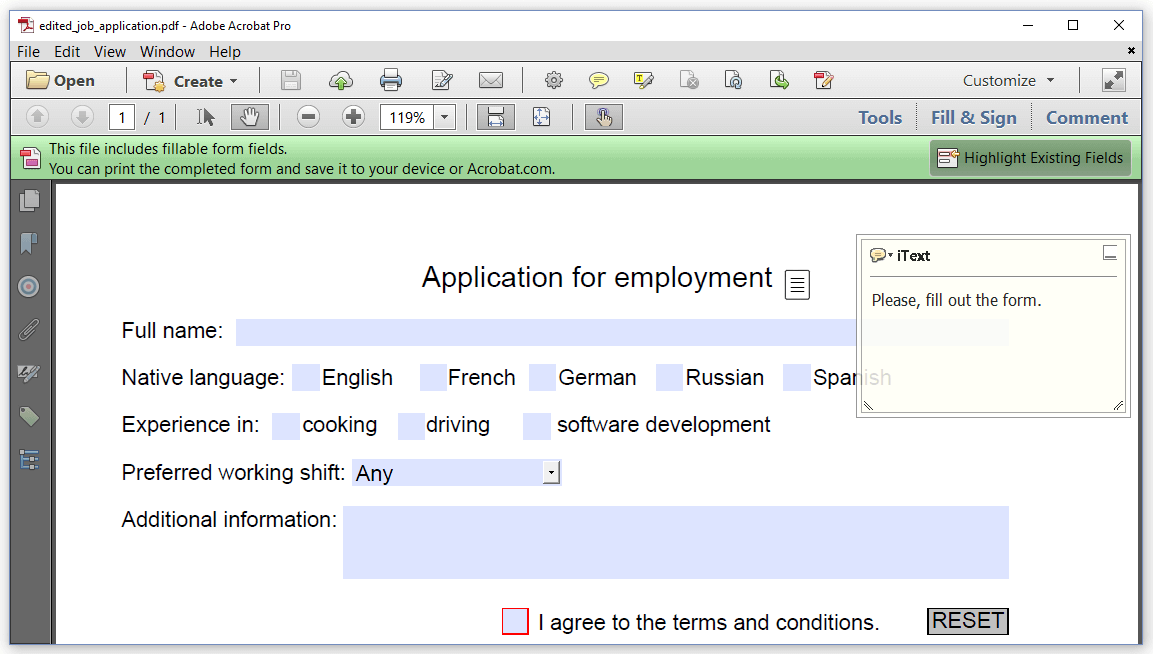
Figure 5.1: an updated form
We'll repeat the code we've seen in the previous chapter in the Add Annotations And Content example.
PdfDocument pdfDoc =
    new PdfDocument(new PdfReader(src), new PdfWriter(dest));
// add content
pdfDoc.close();
Where it says // add content, we'll add the annotation, the extra text, and the extra check box.
Just like in chapter 4, we add the annotation to a page obtained from the PdfDocument instance:
PdfAnnotation ann = new PdfTextAnnotation(new Rectangle(400, 795, 0, 0))
    .setTitle(new PdfString("iText"))
    .setContents("Please, fill out the form.")
    .setOpen(true);
pdfDoc.getFirstPage().addAnnotation(ann);
If we want to add content to a content stream, we need to create a PdfCanvas object. We can do this using a PdfPage object as a parameter for the PdfCanvas constructor:
PdfCanvas canvas = new PdfCanvas(pdfDoc.getFirstPage());
canvas.beginText().setFontAndSize(
        PdfFontFactory.createFont(FontConstants.HELVETICA), 12)
        .moveText(265, 597)
        .showText("I agree to the terms and conditions.")
        .endText();
The code to add the text is similar to what we did in chapter 2. Whether you're creating a document from scratch, or adding content to an existing document, has no impact on the instructions we use. The same goes for adding fields to a PdfAcroForm instance:
PdfAcroForm form = PdfAcroForm.getAcroForm(pdfDoc, true);
PdfButtonFormField checkField = PdfFormField.createCheckBox(
        pdfDoc, new Rectangle(245, 594, 15, 15),
        "agreement", "Off", PdfFormField.TYPE_CHECK);
checkField.setRequired(true);
form.addField(checkField);
Now that we've added an extra field, we might want to change the reset action:
form.getField("reset").setAction(PdfAction.createResetForm(
    new String[]{"name", "language", "experience1", "experience2",
    "experience3", "shift", "info", "agreement"}, 0));
Let's see if we can also change some of the visual aspects of the form fields.
Changing the properties of form fields
In the FillAndModifyForm example, we return to the FillForm example from chapter 4, but instead of merely filling out the form, we also change the properties of the fields:
PdfAcroForm form = PdfAcroForm.getAcroForm(pdfDoc, true);
Map fields = form.getFormFields();
fields.get("name").setValue("James Bond").setBackgroundColor(Color.ORANGE);
fields.get("language").setValue("English");
fields.get("experience1").setValue("Yes");
fields.get("experience2").setValue("Yes");
fields.get("experience3").setValue("Yes");
List options = new ArrayList();
options.add(new PdfString("Any"));
options.add(new PdfString("8.30 am - 12.30 pm"));
options.add(new PdfString("12.30 pm - 4.30 pm"));
options.add(new PdfString("4.30 pm - 8.30 pm"));
options.add(new PdfString("8.30 pm - 12.30 am"));
options.add(new PdfString("12.30 am - 4.30 am"));
options.add(new PdfString("4.30 am - 8.30 am"));
PdfArray arr = new PdfArray(options);
fields.get("shift").setOptions(arr);
fields.get("shift").setValue("Any");
PdfFont courier = PdfFontFactory.createFont(FontConstants.COURIER);
fields.get("info")
    .setValue("I was 38 years old when I became a 007 agent.", courier, 7);
Please take a closer look at the following lines:
line 3: we set the value of the
"name"field to"James Bond", but we also change the background color toColor.ORANGE.line 8-17: we create a Java
Listcontaining more options than the form originally contained (line 8-15). We convert thisListto aPdfArray(line 16) and we use this array to update the options of the"shift"field (line 17).line 19-21: we create a new
PdfFontand we use this font and a new font size as extra parameters when we set the value of the"info"field.
Let's take a look at Figure 5.2 to see if our changes were applied.
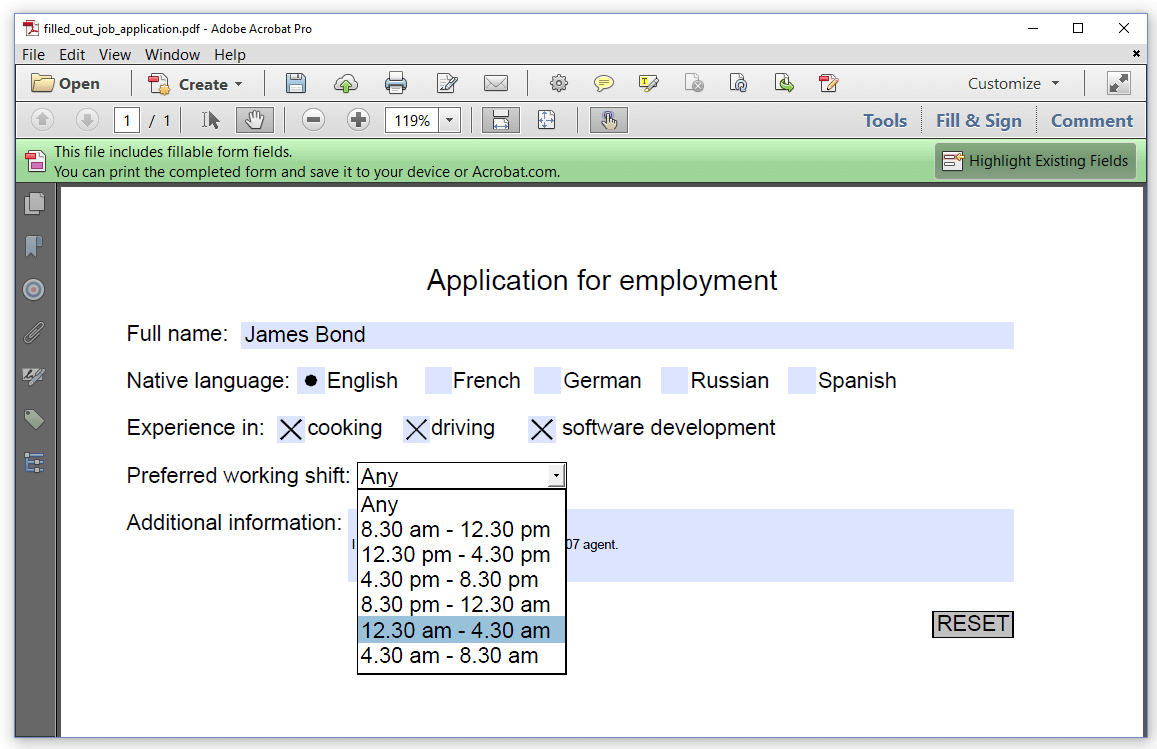
Figure 5.2: updated form with highlighted fields
We see that the "shift" field now has more options, but we don't see the background color of the "name" field. It's also not clear if the font of the "info" field has changed. What's wrong? Nothing is wrong, the fields are currently highlighted and the blue highlighting covers the background color. Let's click "Highlight Existing Fields" and see what happens.

Figure 5.3: updated form, no highlighting
Now Figure 5.3 looks exactly the way we expected. We wouldn't have had this problem if we had added form.flattenFields(); right before closing the PdfDocument, but in that case, we would no longer have a form either. We'll make some more forms examples in the next chapter, but for now, let's see what we can do with existing documents that don't contain a form.
Adding a header, footer, and watermark
Do you remember the report of the UFO sightings in the 20th century we created in chapter 3? We'll use a similar report for the next couple of examples: ufo.pdf, see Figure 5.4.
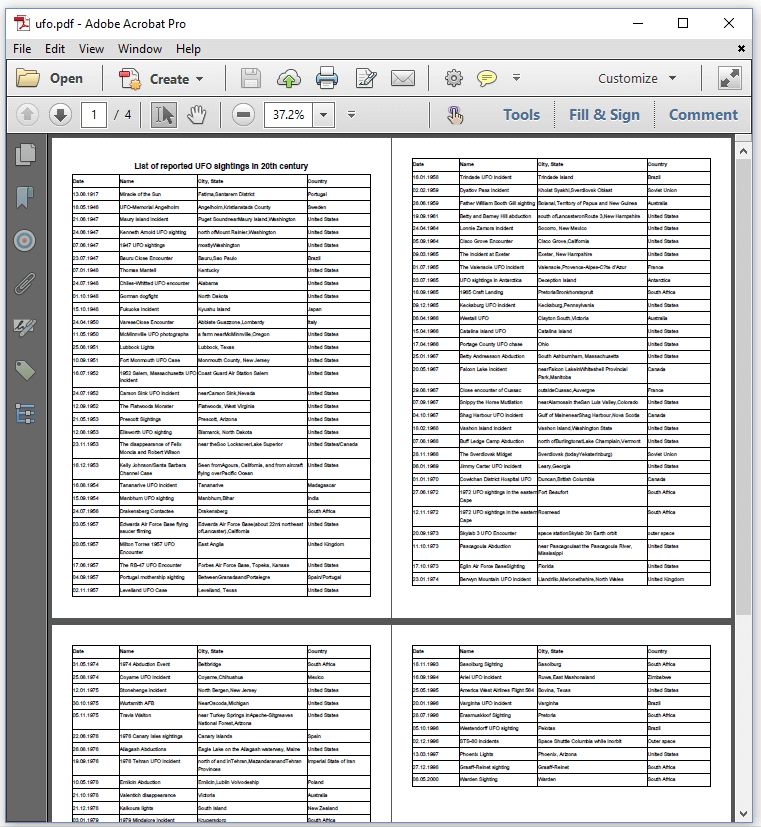
Figure 5.4: UFO sightings report
As you can see, it's not so fancy as the report we made in chapter 3. What if we'd like to add a header, a watermark and a footer saying "page X of Y" to this existing report? Figure 5.5 shows what such a report would look like.
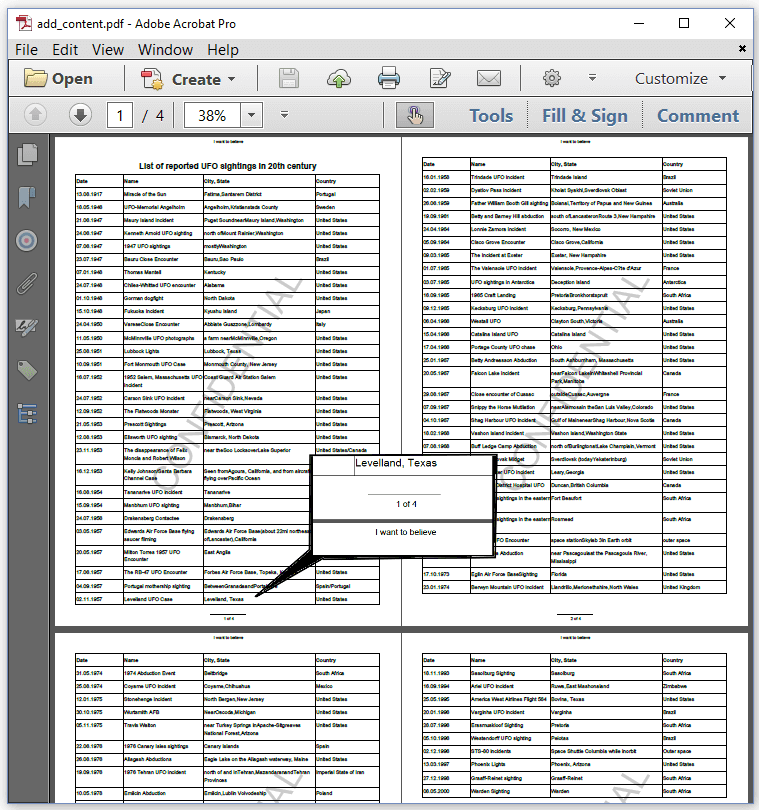
Figure 5.5: UFO sightings report with header, footer, and watermark
In Figure 5.5, we zoom in on an advantage that we didn't have when we added the page numbers in chapter 3. In chapter 3, we didn't know the total number of pages at the moment we were adding the footer, hence we only added the current page number. Now that we have an existing document, we can add "1 of 4", "2 of 4", and so on.
When creating a document from scratch, it's possible to create a placeholder for the total number of pages. Once all the pages are created, we can then add the total number of pages to that placeholder, but that's outside the scope of this introductory tutorial.
The AddContent example shows how we can add content to every page in an existing document.
PdfDocument pdfDoc =
    new PdfDocument(new PdfReader(src), new PdfWriter(dest));
Document document = new Document(pdfDoc);
Rectangle pageSize;
PdfCanvas canvas;
int n = pdfDoc.getNumberOfPages();
for (int i = 1; i <= n; i++) {
    PdfPage page = pdfDoc.getPage(i);
    pageSize = page.getPageSize();
    canvas = new PdfCanvas(page);
    // add new content
}
pdfDoc.close();
We use the pdfDoc object to create a Document instance. We'll use that document object to add some content. We also use the pdfDoc object to find the number of pages in the original PDF. We loop over all the pages, and we get the PdfPage object of each page. Let's take a look at the // add new content part we omitted.
//Draw header text
canvas.beginText().setFontAndSize(
        PdfFontFactory.createFont(FontConstants.HELVETICA), 7)
        .moveText(pageSize.getWidth() / 2 - 24, pageSize.getHeight() - 10)
        .showText("I want to believe")
        .endText();
//Draw footer line
canvas.setStrokeColor(Color.BLACK)
        .setLineWidth(.2f)
        .moveTo(pageSize.getWidth() / 2 - 30, 20)
        .lineTo(pageSize.getWidth() / 2 + 30, 20).stroke();
//Draw page number
canvas.beginText().setFontAndSize(
        PdfFontFactory.createFont(FontConstants.HELVETICA), 7)
        .moveText(pageSize.getWidth() / 2 - 7, 10)
        .showText(String.valueOf(i))
        .showText(" of ")
        .showText(String.valueOf(n))
        .endText();
//Draw watermark
Paragraph p = new Paragraph("CONFIDENTIAL").setFontSize(60);
canvas.saveState();
PdfExtGState gs1 = new PdfExtGState().setFillOpacity(0.2f);
canvas.setExtGState(gs1);
document.showTextAligned(p,
        pageSize.getWidth() / 2, pageSize.getHeight() / 2,
        pdfDoc.getPageNumber(page),
        TextAlignment.CENTER, VerticalAlignment.MIDDLE, 45);
canvas.restoreState();
We are adding four parts of content:
A header (line 2-6): we use low-level text functionality to add
"I want to believe"at the top of the page.A footer line (line 8-11): we use low-level graphics functionality to draw a line at the bottom of the page.
A footer with the page number (13-19): we use low-level text functionality to add the page number, followed by
" of ", followed by the total number of pages at the bottom of the page.A watermark (lin 21-28): we create a
Paragraphwith the text we want to add as a watermark. Then we change the opacity of the canvas. Finally we add theParagraphto the document, centered in the middle of the page and with an angle of 45 degrees, using theshowTextAligned()method.
We're doing something special when we add the watermark. We're changing the graphics state of the canvas object obtained from the page. Then we add text to the corresponding page in the document. Internally, iText will detect that we're already using the PdfCanvas instance of that page and the showTextAligned() method will write to that same canvas. This way, we can use a mix of low-level and convenience methods.
In the final example of this chapter, we'll change the page size and orientation of the pages of our UFO sightings report.
Changing the page size and orientation
If we take a look at Figure 5.6, we see our original report from Figure 5.4, but the pages are bigger and the second page has been turned up-side down.
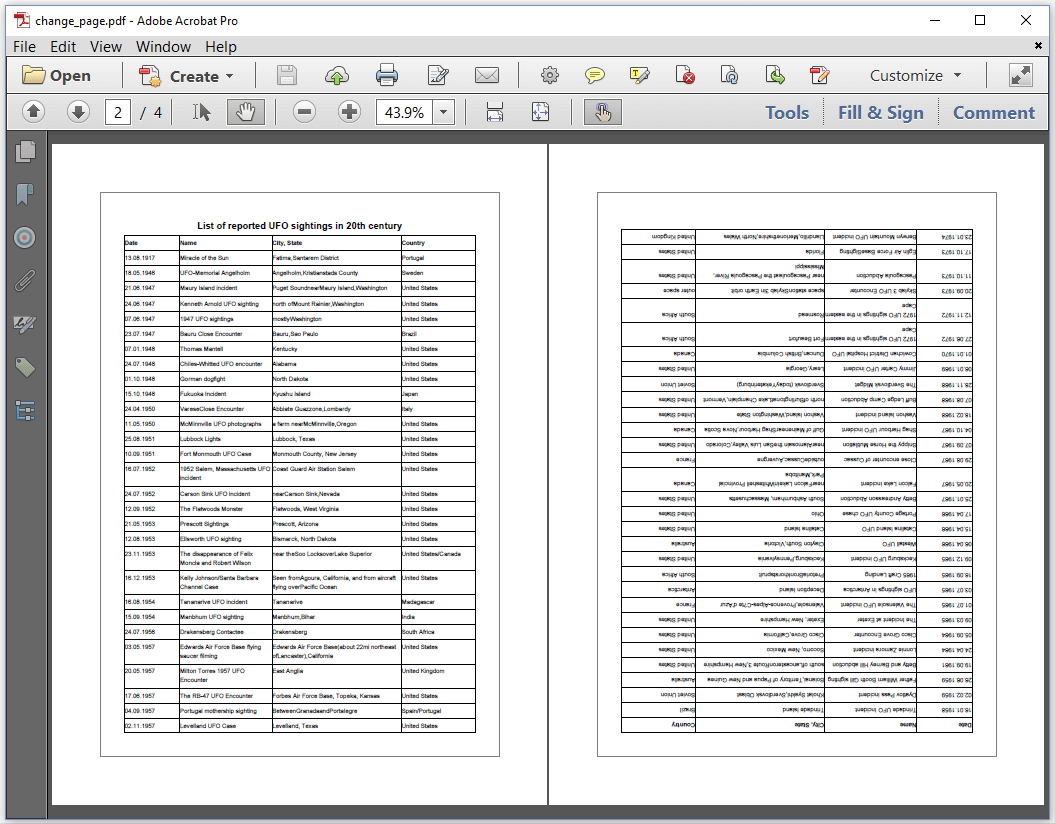
Figure 5.6: changed page size and orientation
The ChangePage example shows how this was done.
PdfDocument pdfDoc =
    new PdfDocument(new PdfReader(src), new PdfWriter(dest));
float margin = 72;
for (int i = 1; i <= pdfDoc.getNumberOfPages(); i++) {
    PdfPage page = pdfDoc.getPage(i);
    // change page size
    Rectangle mediaBox = page.getMediaBox();
    Rectangle newMediaBox = new Rectangle(
            mediaBox.getLeft() - margin, mediaBox.getBottom() - margin,
            mediaBox.getWidth() + margin * 2, mediaBox.getHeight() + margin * 2);
    page.setMediaBox(newMediaBox);
    // add border
    PdfCanvas over = new PdfCanvas(page);
    over.setStrokeColor(Color.GRAY);
    over.rectangle(mediaBox.getLeft(), mediaBox.getBottom(),
            mediaBox.getWidth(), mediaBox.getHeight());
    over.stroke();
    // change rotation of the even pages
    if (i % 2 == 0) {
        page.setRotation(180);
    }
}
pdfDoc.close();
No need for a Document instance here, we work with the PdfDocument instance only. We loop over all the pages (line 4) and get the PdfPage instance of each page (line 5).
A page can have different page boundaries, one of which isn't optional: the
/MediaBox. We get the value of this page boundary as aRectangle(line 7) and we create a newRectanglethat is an inch larger on each side (line 8-10). We use thesetMediaBox()method to change the page size.We create a
PdfCanvasobject for the page (line 13), and we stroke a gray line using the dimensions of the originalmediaBox(line 14-17).For every even page (line 19), we set the page rotation to 180 degrees.
Manipulating an existing PDF document requires some knowledge about PDF. For instance: you need to know the concept of the /MediaBox. We have tried to keep the examples simple, but that also means that we've cut some corners. For instance: in our last example, we didn't bother to check if a /CropBox was defined. If the original PDF had a /CropBox, enlarging the /MediaBox wouldn't have had any visual effect. We'll need a more in-depth tutorial to cover topics like these.
Summary
In the previous chapter, we learned about interactive PDF forms. In this chapter, we continued working with these forms. We added an annotation, some text, and an extra field to an existing form. We also changed some properties while filling out a form.
We then moved on to PDFs without any interactivity. First, we added a header, a footer, and a watermark. Then, we played with the size and the orientation of the pages of an existing document.
In the next chapter, we'll scale and tile existing documents, and we'll discover how to assemble multiple documents into a single PDF.